 Products Home / オプトメカニクス用部品 / 光学ポストアセンブリー / Ø12 mmおよびØ12.7 mmポストアセンブリー / Ø12 mm~Ø12.7 mm(Ø1/2インチ)ポスト用スリップオン式カラー
Ø12 mm~Ø12.7 mm(Ø1/2インチ)ポスト用スリップオン式カラー
- Slip-On Collars for Ø1/2" Optical Posts
- Restrict Post Height or Rotation Orientation
- Exchange Components While Maintaining Alignment
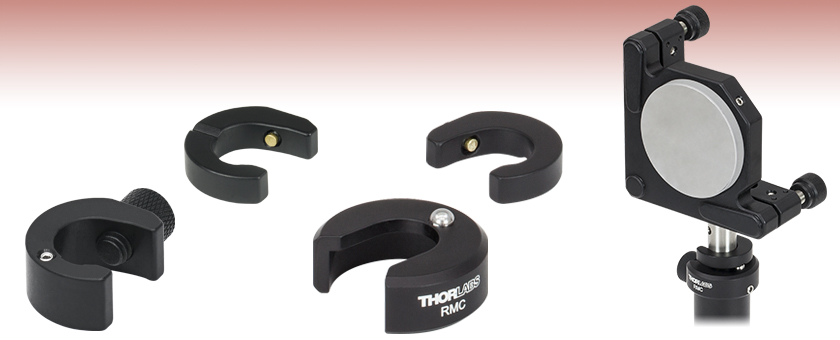
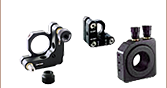
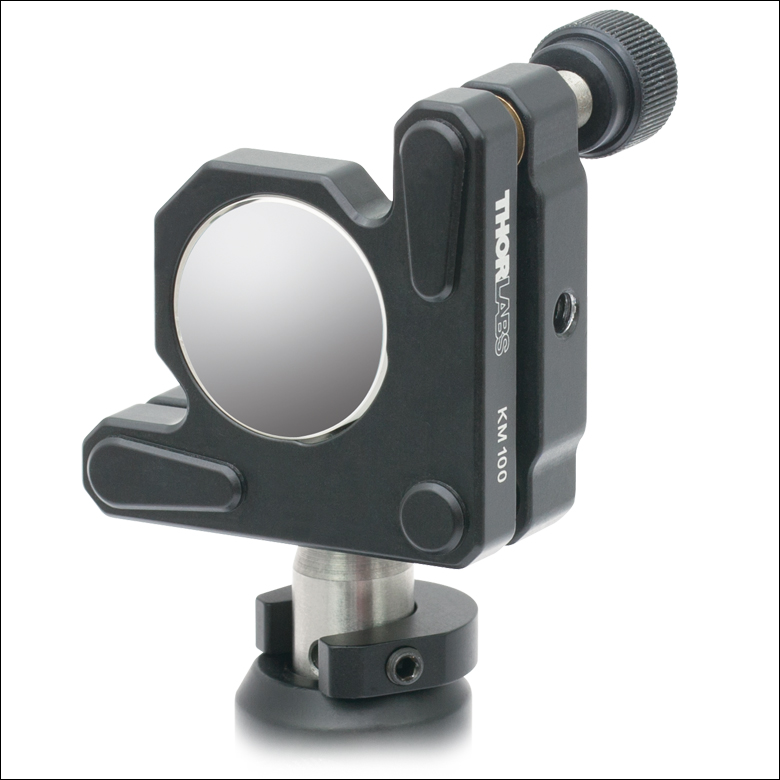
KS2 Ø2" Mirror Mount on Ø1/2" Post with RMC Position-Maintaining Collar
R2
0.44'' (11.2 mm) Thick with Height Adjustment
R2T
Thin, 0.23" (5.7 mm) Thick Design
RMC
Two-Piece Design Maintains Vertical and Rotational Position of a Ø1/2'' Post


Please Wait
特長
- ポストの高さまたは回転方向を保持するカラー
- ポスト用スリップオン式カラーR2/Mは、止めネジ(セットスクリュ)による精密な高さ調整が可能
- ポストカラーRMC は、高さならびに回転方向を一定に保持
このページでご紹介しているスリップオン式カラーは、セットアップ内でポストに取り付けたオプトメカニクス部品を取外す必要がある場合に、一度設定した高さを保持できるように設計されています。 2つの部品で構成されているポストカラーRMCは、ポストの高さ設定に加えてポストの回転方向を一定に保持することができます。 カラーはポストに取り付けられたレンズなどの部品を交換する際に役立ち、レンズの高さをシステムの光軸にアライメントしたままにしておくことができます。 また他のオプションとして、ポストカラーR2/MまたはR2Tを当社の 回転止めアダプタと一緒に用いて、回転方向を一定に保つこともできます。
| Posted Comments: | |
MatthewBeibe 1xslots зеркало регистрация
(posted 2025-04-15 08:50:07.437) Tadeusz Lesniewski
(posted 2025-01-17 22:48:20.293) Are any of these slip-on collars available for 12mm posts? EGies
(posted 2025-01-22 01:05:37.0) Thank you for contacting Thorlabs. We do not have optical post collars specifically designed for 12mm diameter posts. However, the Slip-On Collars for Ø1/2" optical posts should still clamp OK onto a 12mm diameter. I have reached out to you directly regarding your specific application. jdemuth
(posted 2017-07-11 23:29:04.377) I wanted a compact vertical post adjuster, so I took the RMC bottom, (while it is not quite right for this application, it could be adjusted easily to work) and removed the ball bearing, leaving a divot and mounted it to a post holder. I then mounted a APM03 to the post, and viola! I had an extremely compact vertical adjustment mechanism. Ideally you (Thorlabs) could slightly tweak the RMC bottom to better mate with the APM03, this would be even better, and extremely useful!!!
best,
James tfrisch
(posted 2017-08-07 11:37:24.0) Hello, thank you for contacting Thorlabs. It sounds like you are describing an alternative to APM02 with a divot. I can post this in our internal engineering forum and reach out to you directly to discuss your application. cbrideau
(posted 2015-03-09 14:02:53.253) You should offer extras of the upper portion of the RMC collar for purchase. That way you could have several different mounts preset via the upper collar, ready to be swapped out and dropped on to the lower collar on a fixed post holder. cdaly
(posted 2015-03-26 10:16:03.0) Response from Chris at Thorlabs: Thank you for your feedback. We will look into either adding these as new separate components, or possibly making the change to the R2T so that the location groove is standard. cdaly
(posted 2013-03-06 10:40:00.0) Response from Chris at Thorlabs: Thank you for using our web feedback. While this is a point at which the R2 can in fact break, this is under far more stress than the product is intended for. The collar should be sufficiently tight with a quarter turn of a hex key past hand tight. The setscrew is used for initial final positioning. Once the correct height is achieved, the post holder should be used to secure the height of the post. Once this is tight, the set screw can be retracted and the collar readjusted so a repeatable height can occur if the post is removed and reinserted into the post holder. However, if greater torque is required without the small screw, I would recommend that you consider the R2T. It is thinner profile, but has no setscrew and can handle much more toque. You'll need to use a ball driver or hex key to tighten this down as it uses an 8-32 set screw to clamp to the post, rather than the 1/4-20 thumbscrew in the R2. Thorlabs
(posted 2011-01-19 09:33:18.0) Response from Javier at Thorlabs to graum: Thank you very much for your feedback. We actually offer a few other components that are designed for mounting 1/2" posts parallel to the optical table and, at the same time, are attached to perpendicularly mounted posts. Please visit the following link: http://www.thorlabs.com/NewGroupPage9.cfm?ObjectGroup_ID=1985 graum
(posted 2011-01-18 14:03:49.0) I use a lot of R2 post collars with my 1/2" posts in lab. One thing Ive found useful is to give them an additional 4-40 tap. With this I can screw on a 1/2" post to the side, and then use this post-collar assembly to mount a post parallel to my table off of a post already mounted perpendicular to the table.
I think this would be a useful addition to anyone who wants to use these posts. It would certainly increase their value to my lab. |

 ズーム
ズーム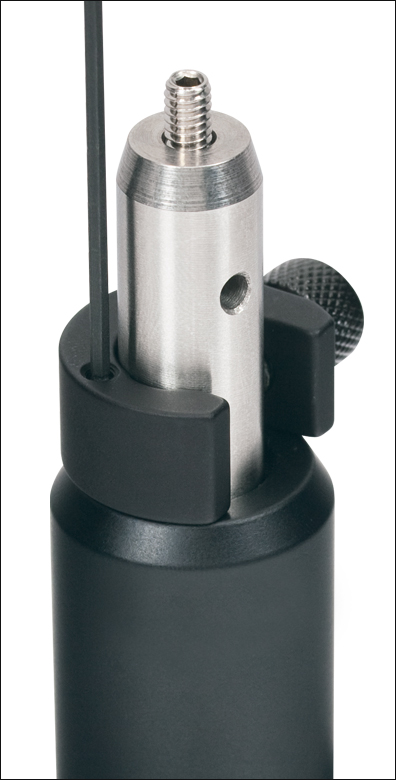
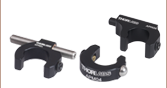
- 厚さ11.2 mm
- 垂直方向の調整用M3 x 0.5止めネジ(セットスクリュ)付き
- 5個入りパックもご用意
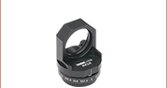
スリップオン式カラーR2/Mは、Ø12 mm~Ø12.7 mm(Ø1/2インチ)ポストにつまみネジで固定できます。このカラーをポストホルダの上部の位置にくるようにポストに装着すれば、取り付けた部品の高さを一定に保ったままポストを回転させることができます。 R2/MにはM3 x 0.5止めネジも付いています。この調整ネジを1.3 mm六角レンチで調整することで、ポストやポストホルダを動かさずに、約6.4 mmの高さ調整が可能です(Figure 386A参照)。 また、R2/Mと回転止めアダプタTRK05を一緒に使用してポストの回転を制限することもできます。

 ズーム
ズーム
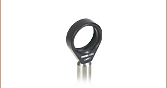
- 厚さ5.7 mm
- 部品間隔の狭いセットアップに取付けが簡単な薄型設計
- 5個入りパックで販売
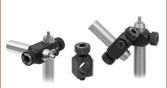
R2Tは、上に掲載されているポスト用カラーR2/Mの薄型タイプで、付属の先端が真ちゅう製の#8-32止めネジでØ12 mm~Ø12.7 mm(Ø1/2インチ)のポストに固定できます。 このカラーをポストホルダの上部の位置でポストに装着すれば、取り付けた部品の高さを一定に保ったままポストを回転させたり外したりできます。 また、厚さがわずか5.7 mmなので、ポスト上であまり場所をとらず、ポストホルダに近い高さに部品を取り付けることができます。
R2Tと回転止めアダプタTRK05を一緒に使用してポストの回転を制限することもできます。 また、各R2Tには左図にあるように小さな溝が付いており、位置保持用ポストカラーRMC(下記参照)を使用しているセットアップ内で、追加のポスト用カラーとして使用することも可能です。

 ズーム
ズーム
Click for Details
Figure 505B 高さと回転方向を一定に保持できるポストカラーRMC
Video 505A 位置保持用ポストカラーの使用方法
- 2つの部品からなるポストカラーで高さならびに回転方向を一定に保持
- スチール製のボールとV型溝により≤0.5°の角度再現性
- 高さを0.3 mm以内に維持
位置保持用ポストカラーRMCを使用することで、セットアップ内で一度設定したØ12 mm~Ø12.7 mm(Ø1/2インチ)ポストならびにポストホルダの高さと回転方向を一定に保持できます。カラーは、刻印が施された厚さ11.9 mmのポストホルダーカラーおよびこれより薄い厚さ5.7 mmのポストカラーの2つの部品で構成されています。スチール製のボールとこれに対応するV型溝が、≤0.5°の角度再現性を可能にしています。
RMCを使用するには、Video 505A のようにポストホルダーカラーをØ12 mm~Ø12.7 mmポスト用ホルダの上に装着し、2 mm六角レンチでナイロンチップ付き#8-32止めネジ(セットスクリュ)を締めて位置を固定します。次にポストカラーのV型溝をポストホルダーカラーか ら突き出ているスチール製ボールにはめ込んで、ポストの高さを設定します(Figure 505B参照)。そして先端が真ちゅう製の#8-32止めネジを2 mm六角レンチで締めてポストカラーをポストに固定します。組立後でも、僅かながら回転方向の調整が可能で、下側のカラーの止めネジを緩めて回転することができます。
ポストカラーRMCを使用することで、ポストに取り付けられたオプトメカニクス部品を、その高さと回転方向を保持したまま素早く交換できます。その際、交換する部品には高さの設定されたポストカラーが装着されている必要があります。最良の結果を得るためには、止めネジがバネ式つまみネジの反対側にくるようにポストホルダーカラーを設置してください(Figure 505B参照)。下側のカラーの回転位置を調整する際には、ポストホルダのつまみ ネジからポストに予荷重がかかるようにしてください。これにより、調整する間も、ポストホルダとポスト間の2線接触を維持することができます。